Hello fellow sports fans!
Baseball is on my mind, so it was an easy decision to do a baseball rock for the second installment of my painted rock series!

Have you ever found a painted rock? It was part of a movement that knows that one message, at just the right time, can really change your outlook. Members paint rocks with inspiring words, pictures, and messages, and leave them for people to find. There are skeptics that criticize the whole idea of this human disruption of nature, and it is prohibited at places like National Parks, but I do like the concept.
For me, my rocks will stay in my yard, in my garden and potted plants, and maybe will be used to brighten up some spots in my house. But I’ll leave it up to you to decide what to do with your creations.
Now, are you ready to get started with a baseball rock?
Step 1 – Collect the Supplies
Here’s what you need:
- Smooth Rocks
- Hunt for smooth rocks near water (oceans, rivers, streams & lakes)
- Or purchase from craft or home improvement stores in the garden department.
- I found my bag at the local craft store for about $5
- Liquid acrylic paints in White and Red (I use acrylic, because you can wash up with just water).
- Wide paintbrush (1” to 2”)
- Small paintbrush (for painting the lines)
- Clear sealer (optional, but get something non-yellowing and marked specifically for exterior use if you plan to use your rocks outside).
- Newspaper (to protect your work surface)

Step 2 – Clean Your Rocks (especially if you found your rocks outdoors)
- Soak rocks in hot water for a few minutes
- Scrub away any dirt with an old toothbrush or a sponge
- Pat with a towel and let air dry completely before painting
Step 3 – Paint the Base Coat
- Choose which side of the rock will be the front (use the smoother, flatter side)
- Turn the front side down on the work surface
- Shake the white paint well
- Put a small puddle of paint on the back of the rock
- Use a large brush to paint the back and sides of the rock
- Wash out your brush, and set aside to dry
- Allow to the rock dry
- Turn the rock over, and repeat the steps to paint the front
- NOTE: You may need a second coat of paint to completely cover the color of the rock
Step 4 – Paint the Lines
- Shake the red paint well
- Put a small puddle of paint on the newspaper
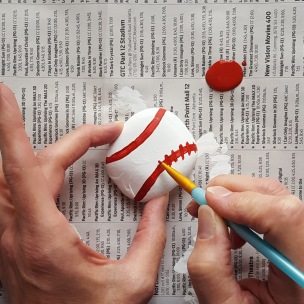
- Use a small brush to paint the long, curved lines (using the picture as a guide)
- You could draw your lines with a pencil first
- Use the small brush to paint the “stiches” across the long, curved lines
- Wash out your brush, and set aside to dry
- Allow the red paint to dry
- Touch up the lines, if needed
Step 5 – Clear Coat (optional, but recommended for outside use)
- Spray your rock with the clear coat
- Allow to dry

There you go! A painted baseball rock!
Comment below and let me know if you decided to make one! Also let me know if you have any specific requests for painted rocks you’d like to see me create!
Until next week,
Carrie
P.S. Did you make last week’s painted Basketball rock? Let me know how it went!


